Categories
Tag Cloud
How To Add An Image Signature To Your RoundCube Webmail Client
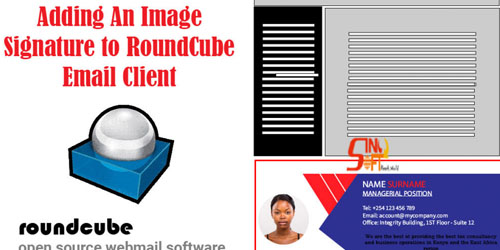
To add an image signature to your RoundCube Webmail client, you need to have an email address that you want such to be configured. Follow the steps outlined below to complete the proceses of adding an image/banner to the email as shown below.
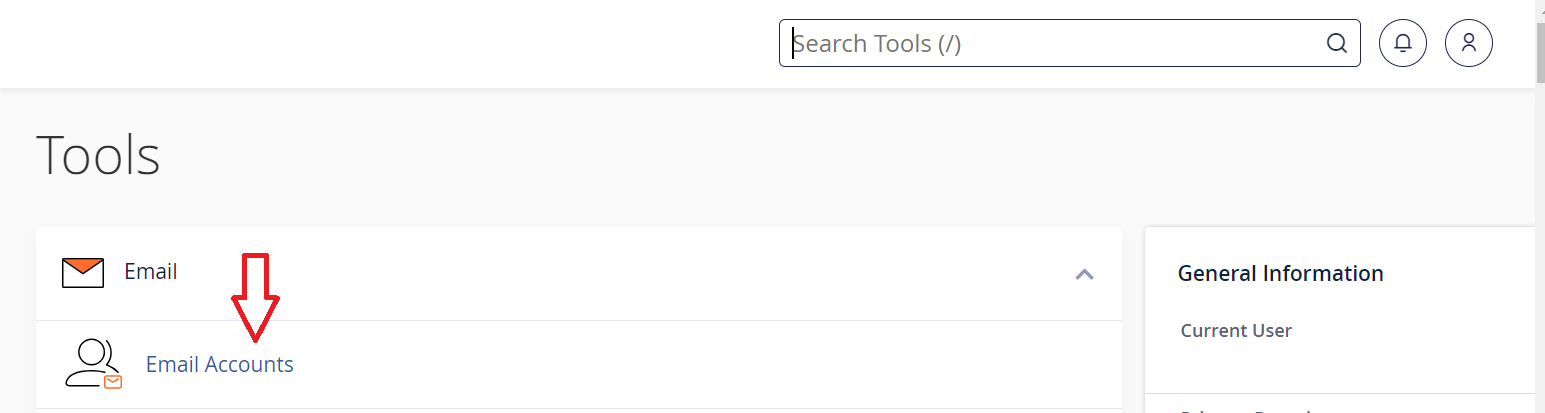
Access your cPanel details and log in.
Under the Email section, click on Email Accounts.
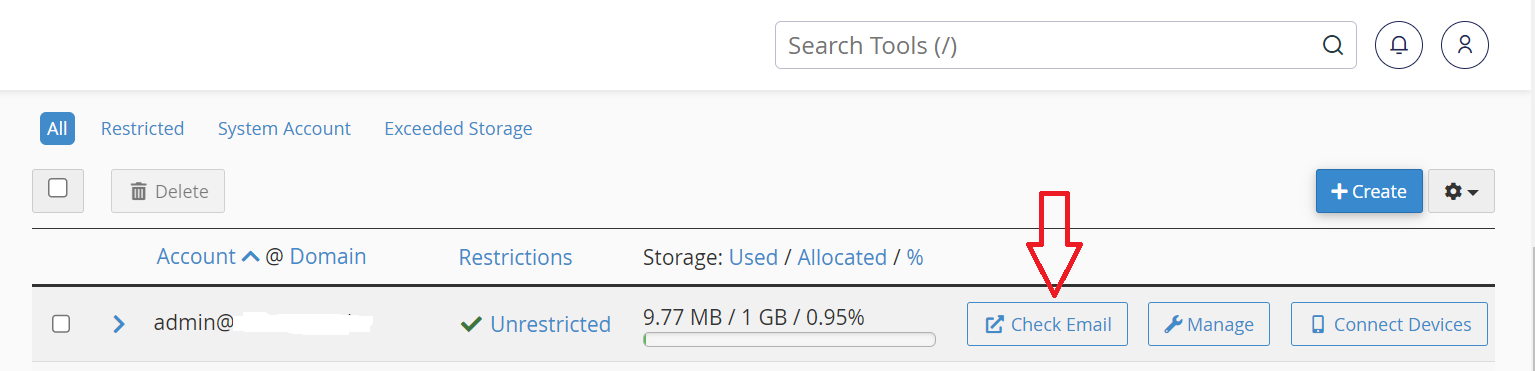
Choose the email address you want to access from the resulting email accounts page. Click on Check Email.
Alternatively, you can log in to Webmail and it will direct you here to choose your preferred email client from among RoundCube, Horde and AfterLogic WebMail. Here, we’re going to use RoundCube.

After that go to Settings > Preferences > Composing Messages. Once there configure the following options so RoundCube will attach a signature to your emails:
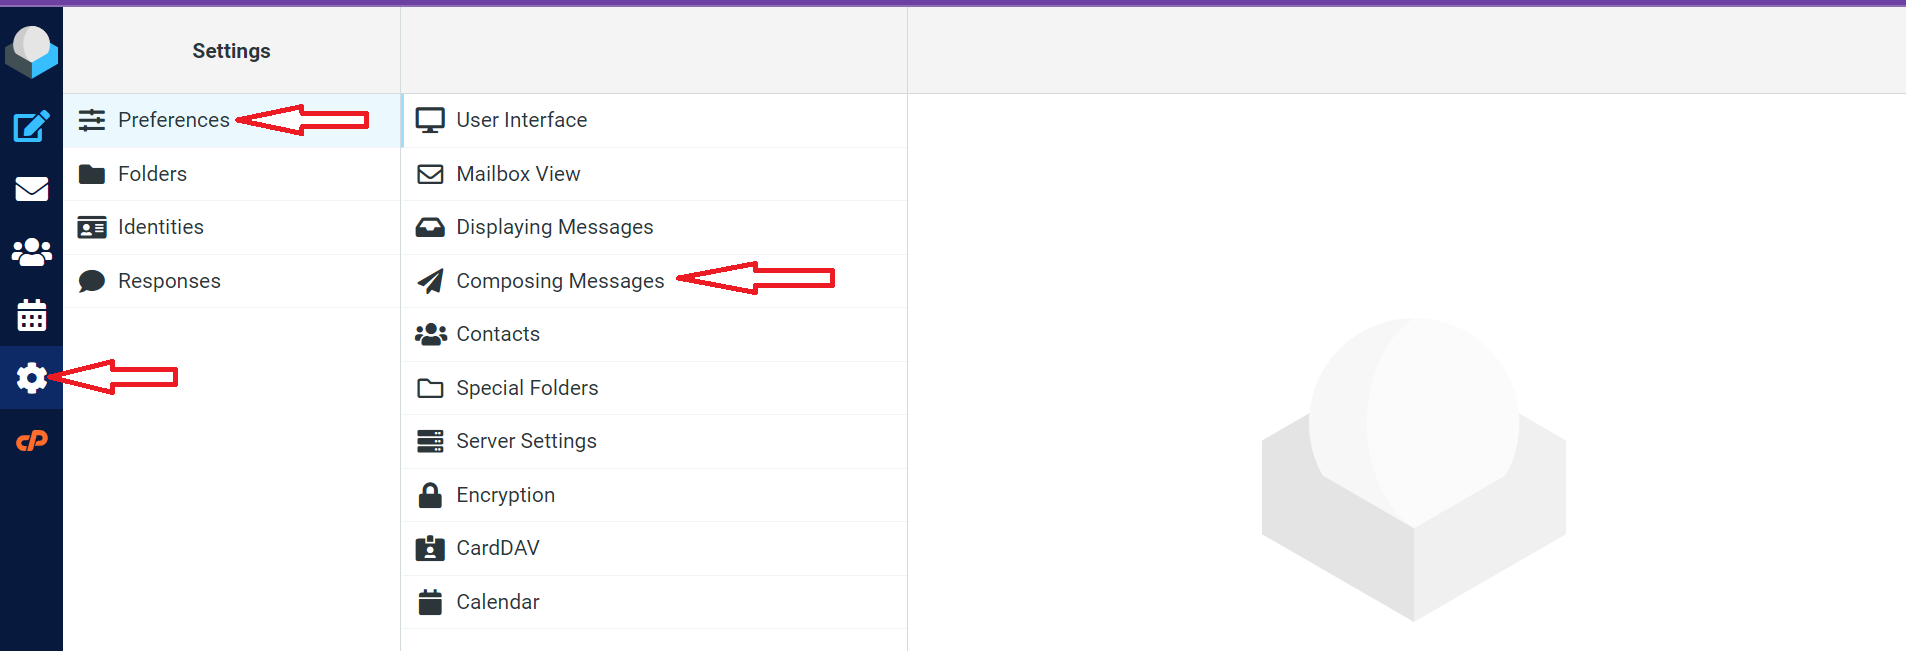
- Compose HTML messages to Always
- Automatically Add Signature to Always
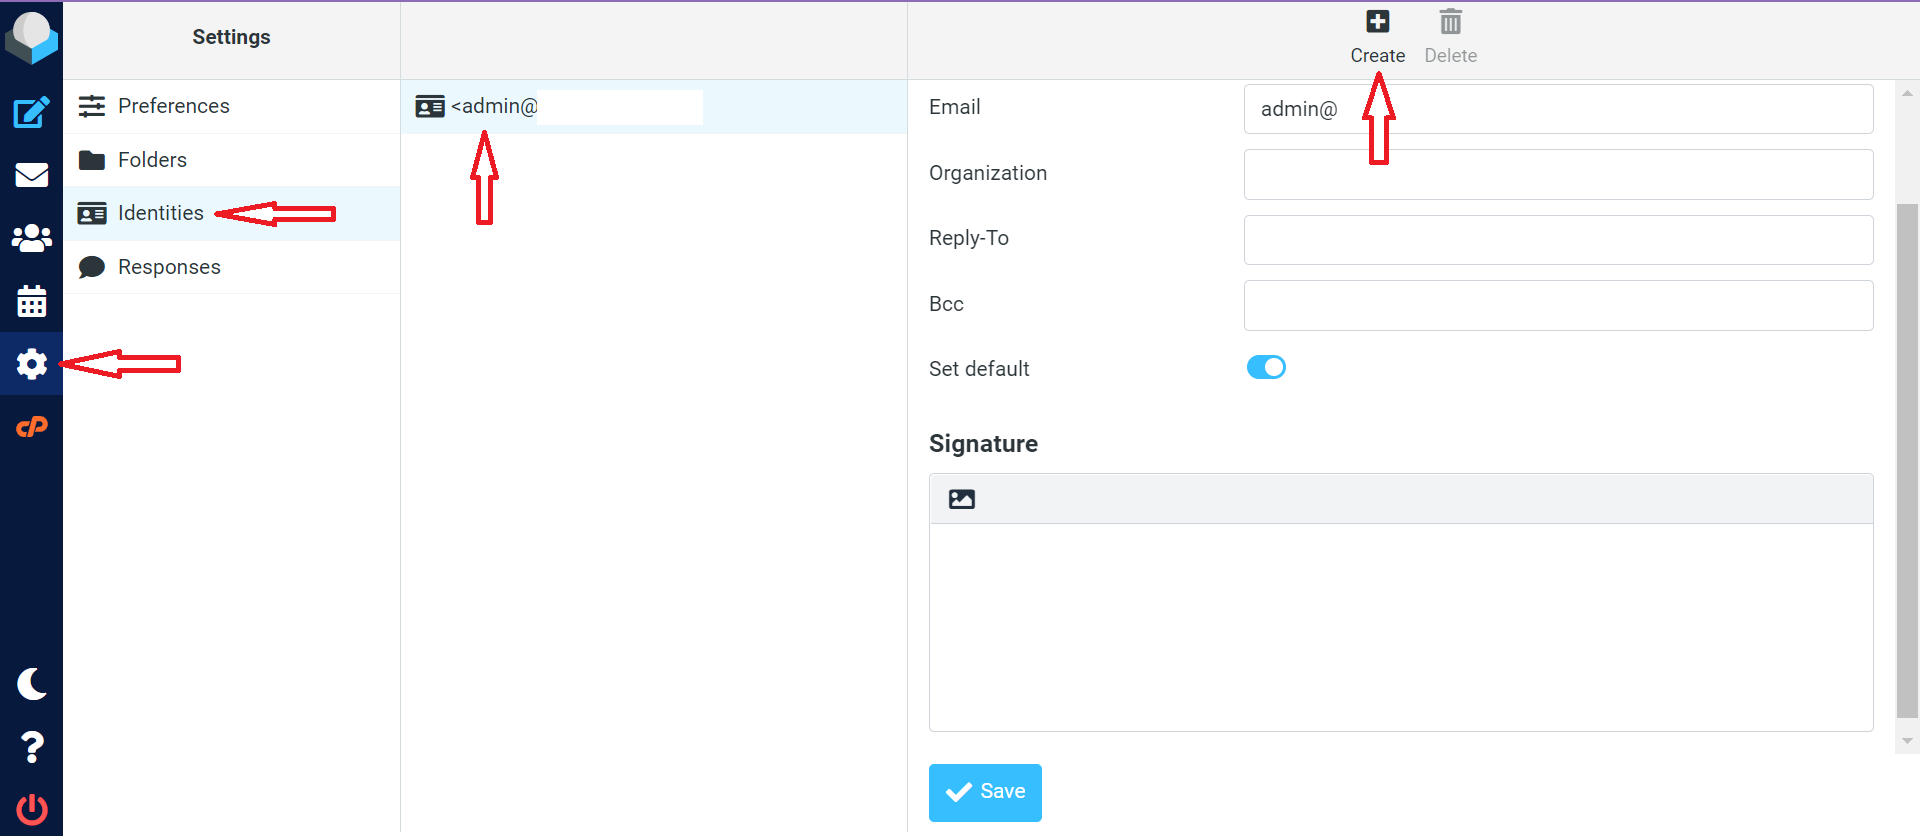
To edit the signature itself, go to Settings > Identities. Click on the email address you want to edit the signature to bring up the editable fields. You can either choose the default identity or create a new one.
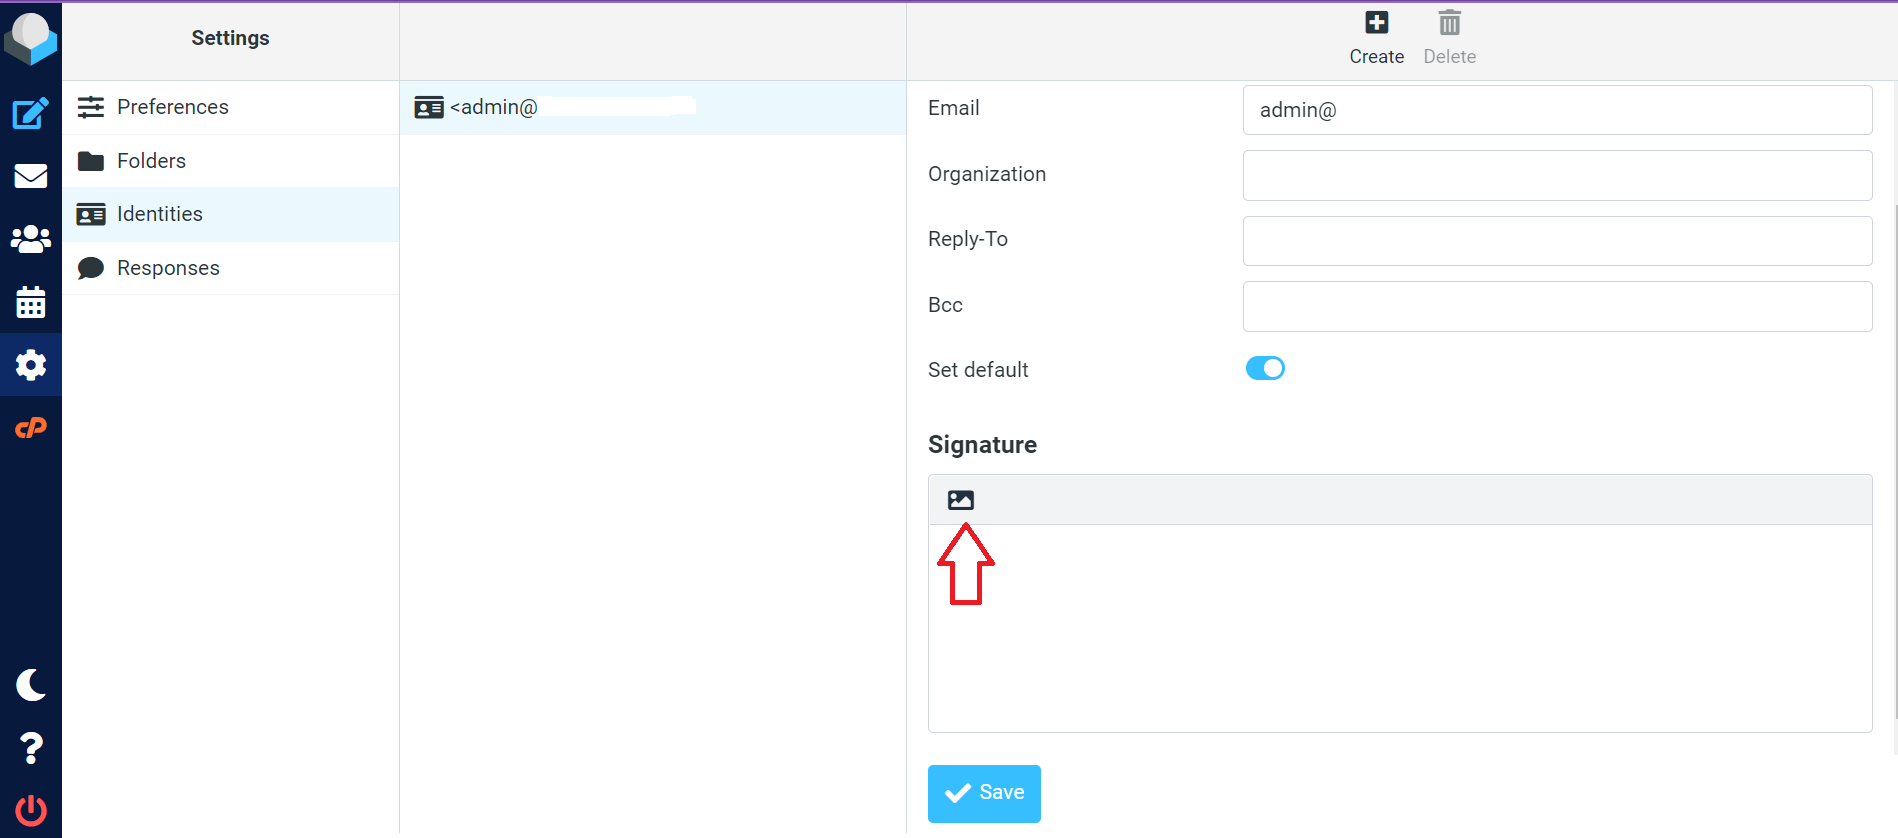
Under the Signature section check the box next to HTML signature and enter the desired information in the Signature field.

You have two options to add an image to your signature:
Use the Insert/Edit image in the Signature field.
In this tool, you can upload an image from your computer, or specify the image URL location.
Alternatively, you can drag and drop the image URL from your browser to the Signature field in RoundCube.
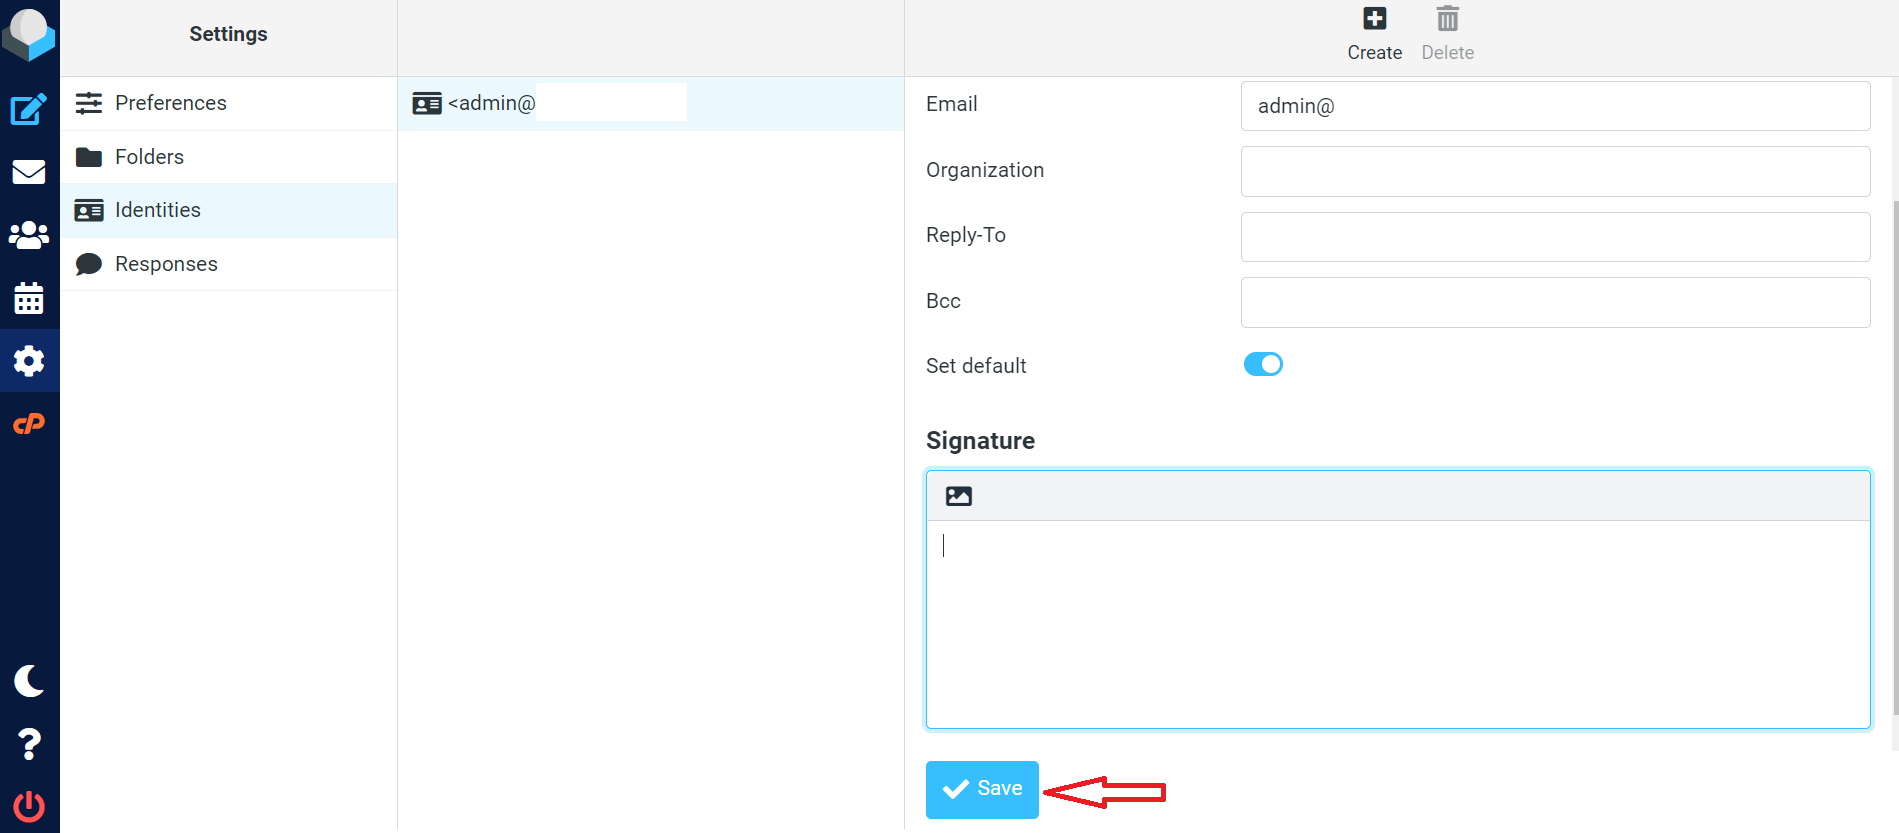
Finally, Save the changes, and the image of your choice will appear when you compose your messages.
To add an image signature to your RoundCube Webmail client, you need to have an email address that you want such to be configured. Follow the steps outlined below to complete the proceses of adding an image/banner to the email as shown below.
Access your cPanel details and log in.
Under the Email section, click on Email Accounts.
Choose the email address you want to access from the resulting email accounts page. Click on Check Email.
Alternatively, you can log in to Webmail and it will direct you here to choose your preferred email client from among RoundCube, Horde and AfterLogic WebMail. Here, we’re going to use RoundCube.
After that go to Settings > Preferences > Composing Messages. Once there configure the following options so RoundCube will attach a signature to your emails:
- Compose HTML messages to Always
- Automatically Add Signature to Always
To edit the signature itself, go to Settings > Identities. Click on the email address you want to edit the signature to bring up the editable fields. You can either choose the default identity or create a new one.
Under the Signature section check the box next to HTML signature and enter the desired information in the Signature field.
You have two options to add an image to your signature:
Use the Insert/Edit image in the Signature field.
In this tool, you can upload an image from your computer, or specify the image URL location.
Alternatively, you can drag and drop the image URL from your browser to the Signature field in RoundCube.
Finally, Save the changes, and the image of your choice will appear when you compose your messages.


