How To Create A Free Website In Kenya (Helpful Illustrated Guide)
Learn how to create a Free website with Weebly Site Builder. With only 7 Steps, you will have your website ready! Creating a website needs technical skills most of the time. But what if there was a tool that could help you do it in less than 24 hours?
Even if you've never attended a coding class, by using this drag-and-drop interface that is user-friendly and grants plenty of flexibility and customization y!
See below steps to create a free website in Kenya (Helpful Illustrated Guide): -
Table of Contents
1. Wondering how to create a free website in Kenya?
3. How to Create a Free Website in Kenya
- Step 1: Create a Custom Domain Name
- Step 2: Go to Free Website Builder
- Step 3: Review and Checkout
- Step 4: Sign Up and Complete Order
- Step 5: Choosing the Type of Website You Want to Build
4. Preview Your Favorite Designs
9. List of pages to add to your website when editing with Weebly
Wondering how to create a free website in Kenya?
In this article, you will learn step by step how to create a website without hiring a website designer or spending any coin.
I know what you are thinking; that it is not possible! Well, it is possible. You can create a website without spending any coin and coding skills, thanks be to website builders.
What is a website builder?
A website builder allows you to design a website without any coding experience.
It’s an easy solution for freelancers, small business owners or anyone who wants to put up a website quickly without investing too much time or money.
This is by using a drag-and-drop interface that is user-friendly to use and grants plenty of flexibility and customization. See below steps to create a free website in Kenya (Helpful Illustrated Guide) :-
How to Create a Free Website in Kenya
The following are simple step by step guide on how to create a website for absolutely nothing here in Kenya.
Step 1: Create a Custom Domain Name
Weebly will ask you to type in your domain name, before you start building your free website you will need a custom domain name and web hosting – if you have one already please ignore this step, if you do not have one, a good affordable option is to buy your domain name with Sino Soft Limited.
No guide on building a website would be complete without some tips on how to create the best domain name. So, here are our top tips:
- Keep the name short
- Include popular keywords
- Target your area
- Make it memorable
- And voilà! You have a beautiful domain just waiting to be used.
In case you are wondering what domain name to choose read on Top-Level Domain (TLD).
We now presume you already have a domain name. Let’s get on with building your site so you can make good use of it.
Step 2: Go to Free Website Builder
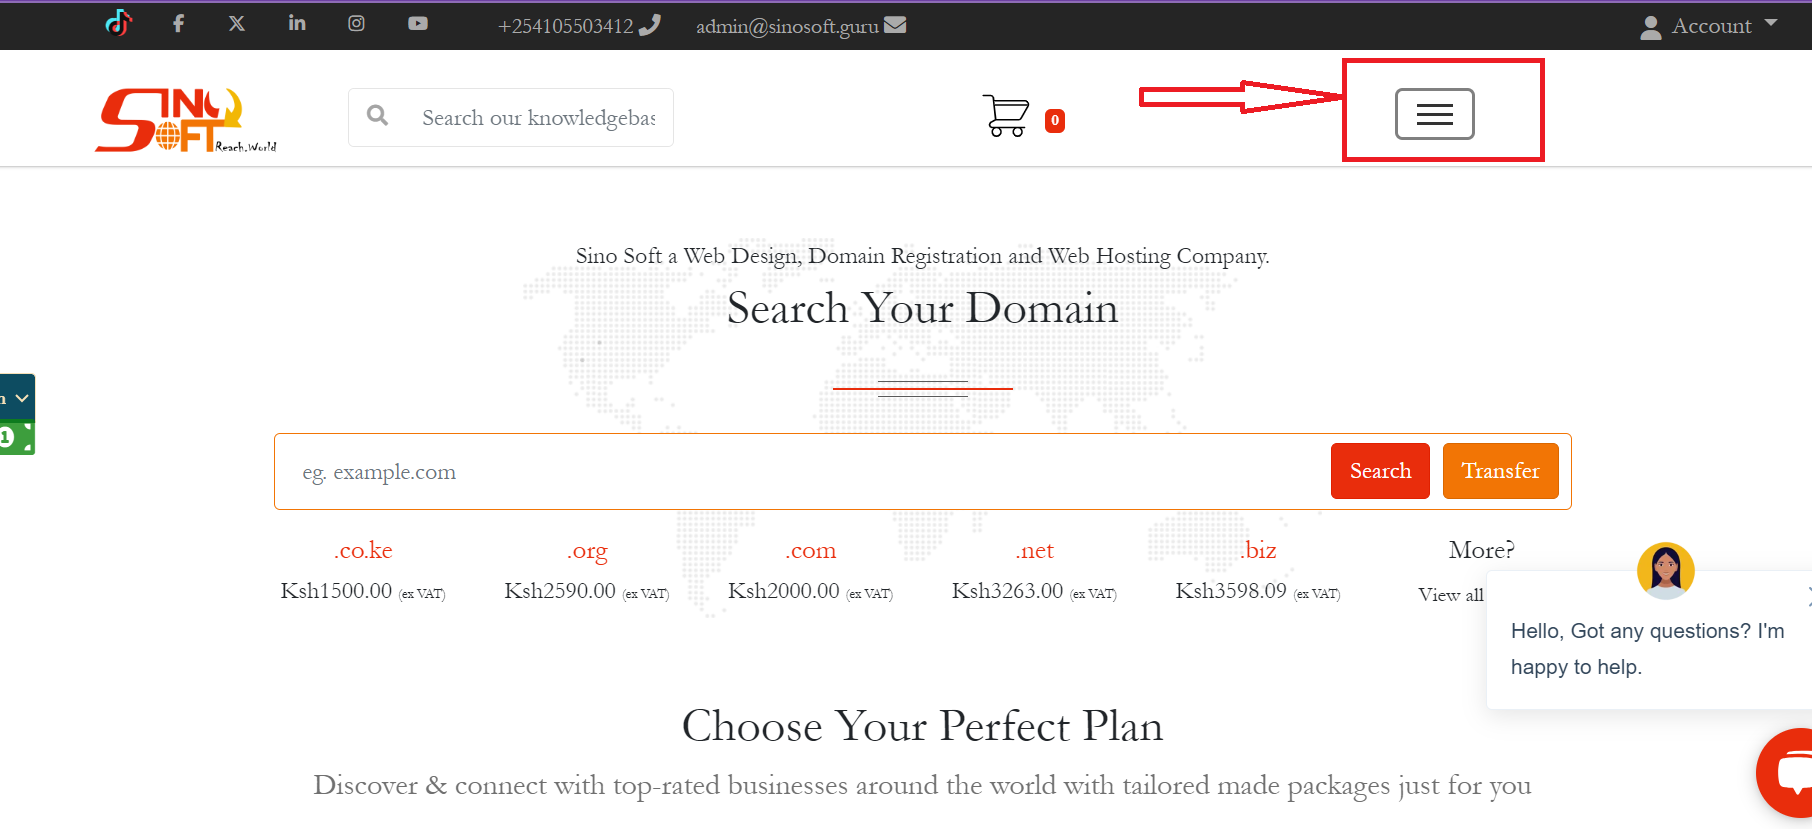
Go to Free Site builder or go to Sino Soft Menu items-->Click Humburger Menu-->Go to Websites and Hosting Menu-->Free Website Builder.
Below are the steps to access Free Website Icon menu.
a) Click on the Humburger Icon
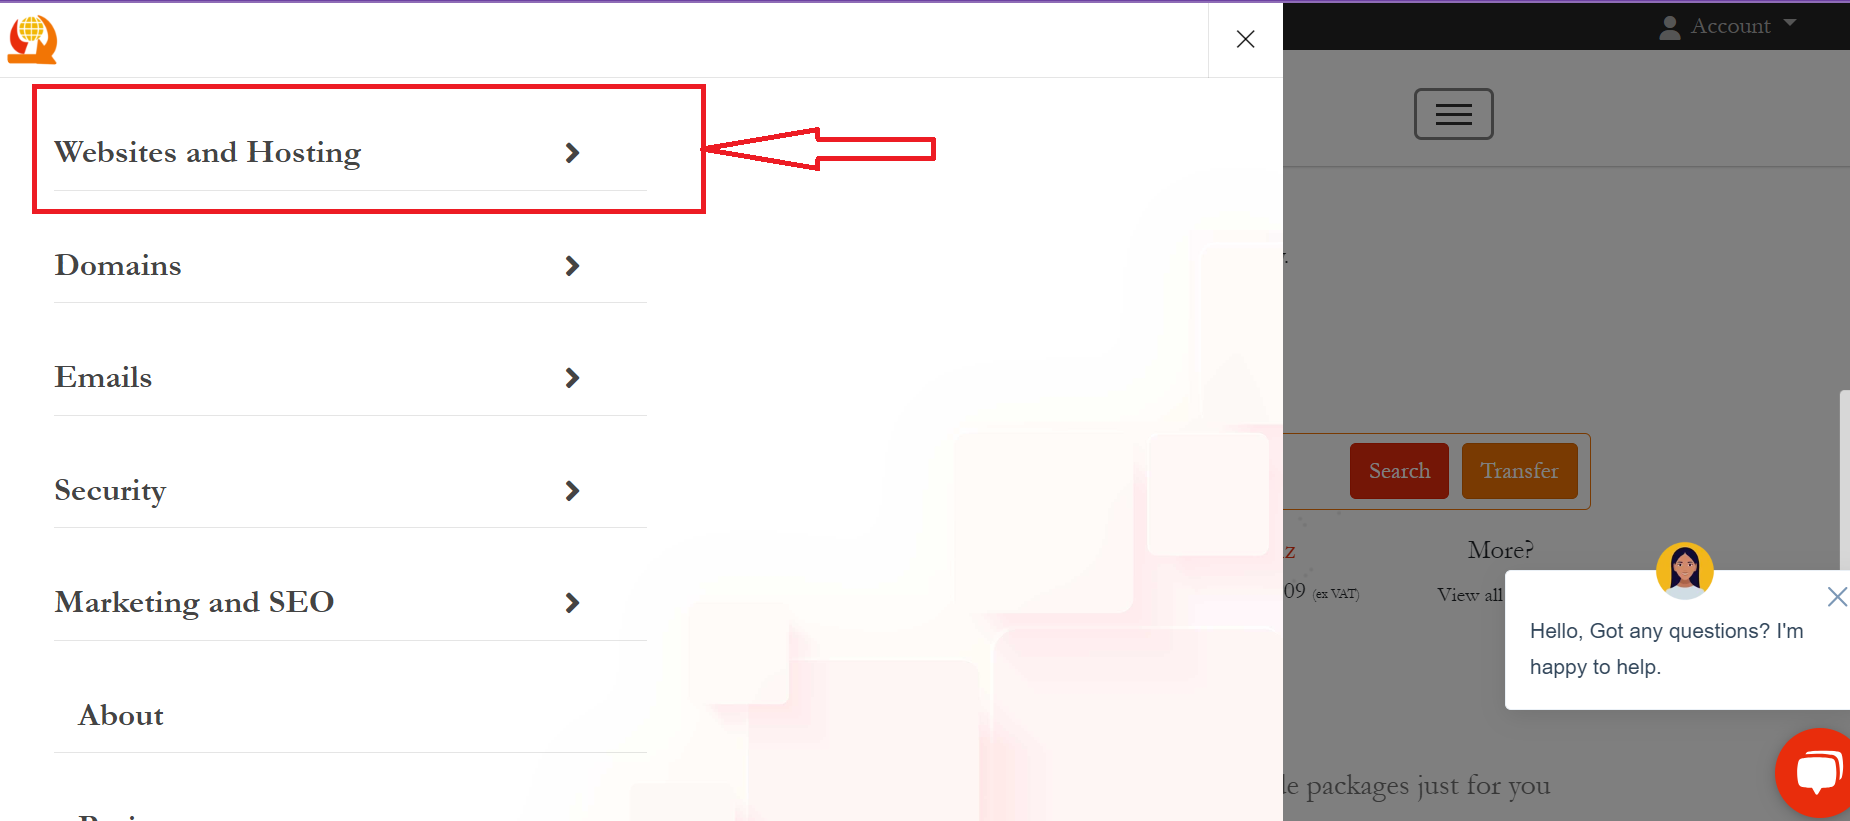
b) Go to Websites and Hosting
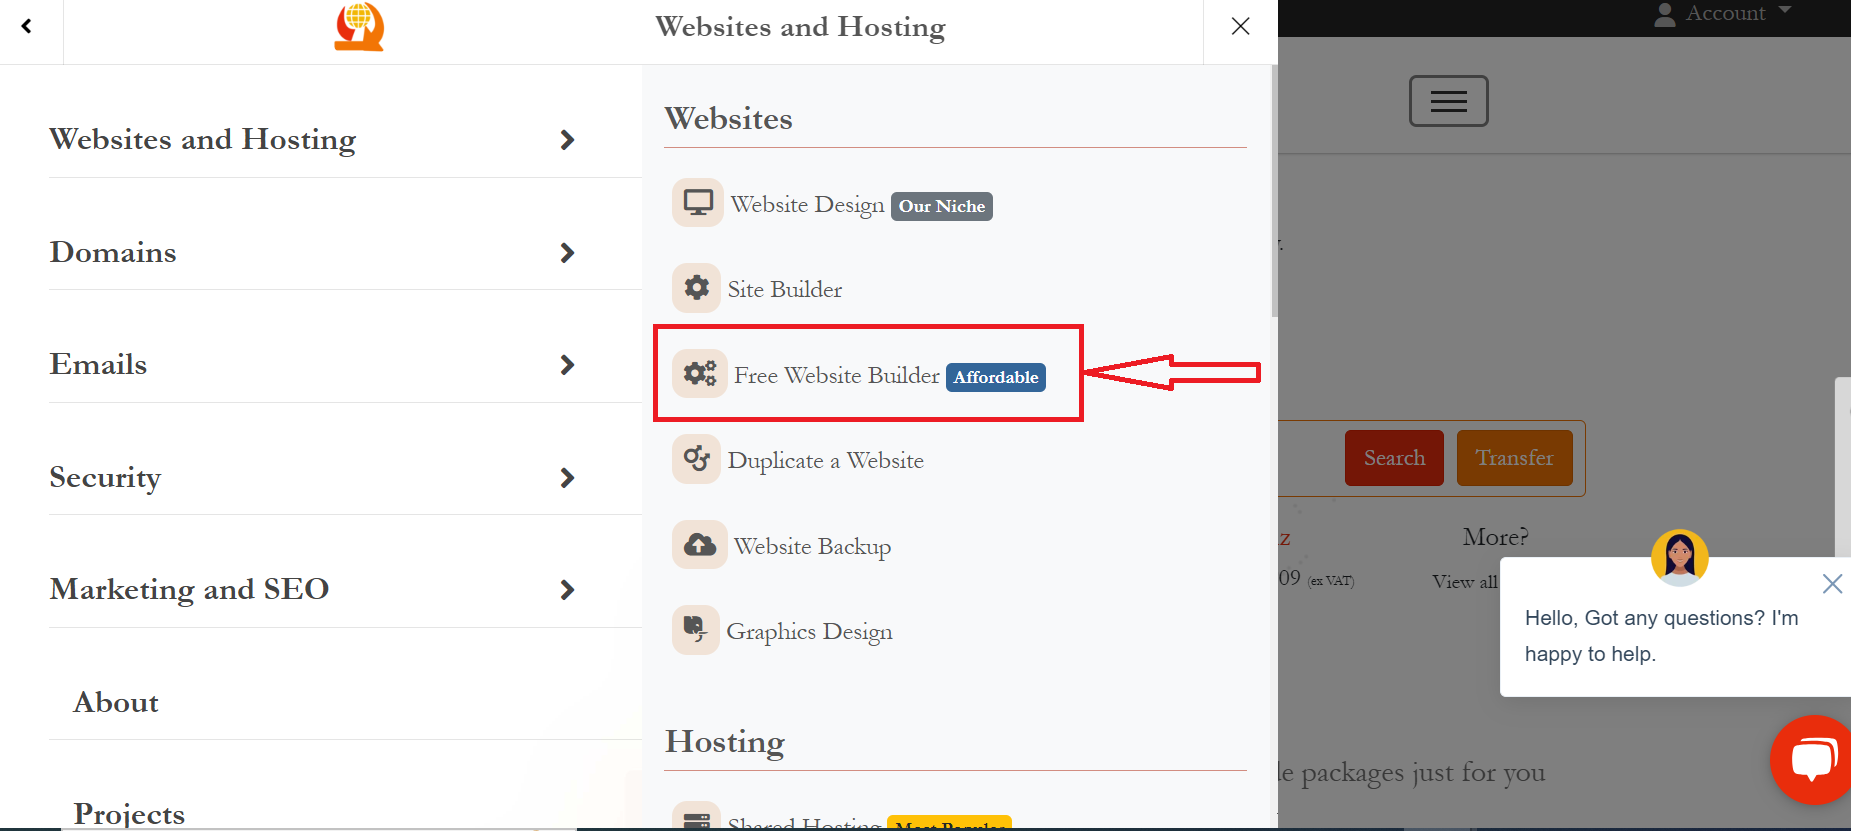
c) Click on Free Website Builder
 d) Scroll down to and click on "Get Started Now".
 e) Insert your custom domain then tap on checkout button.
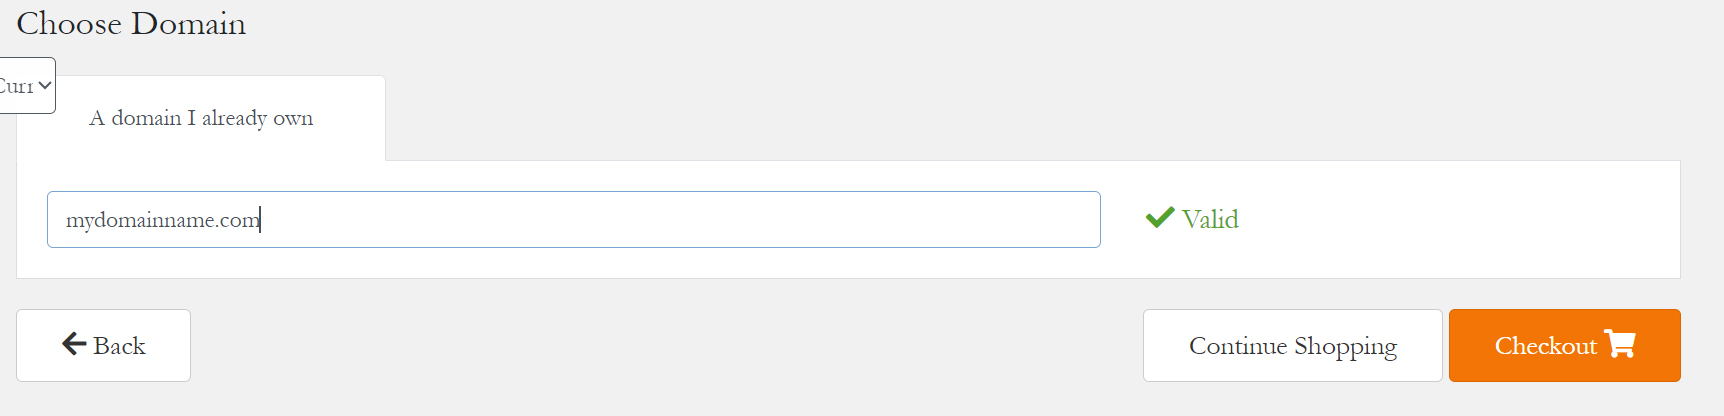
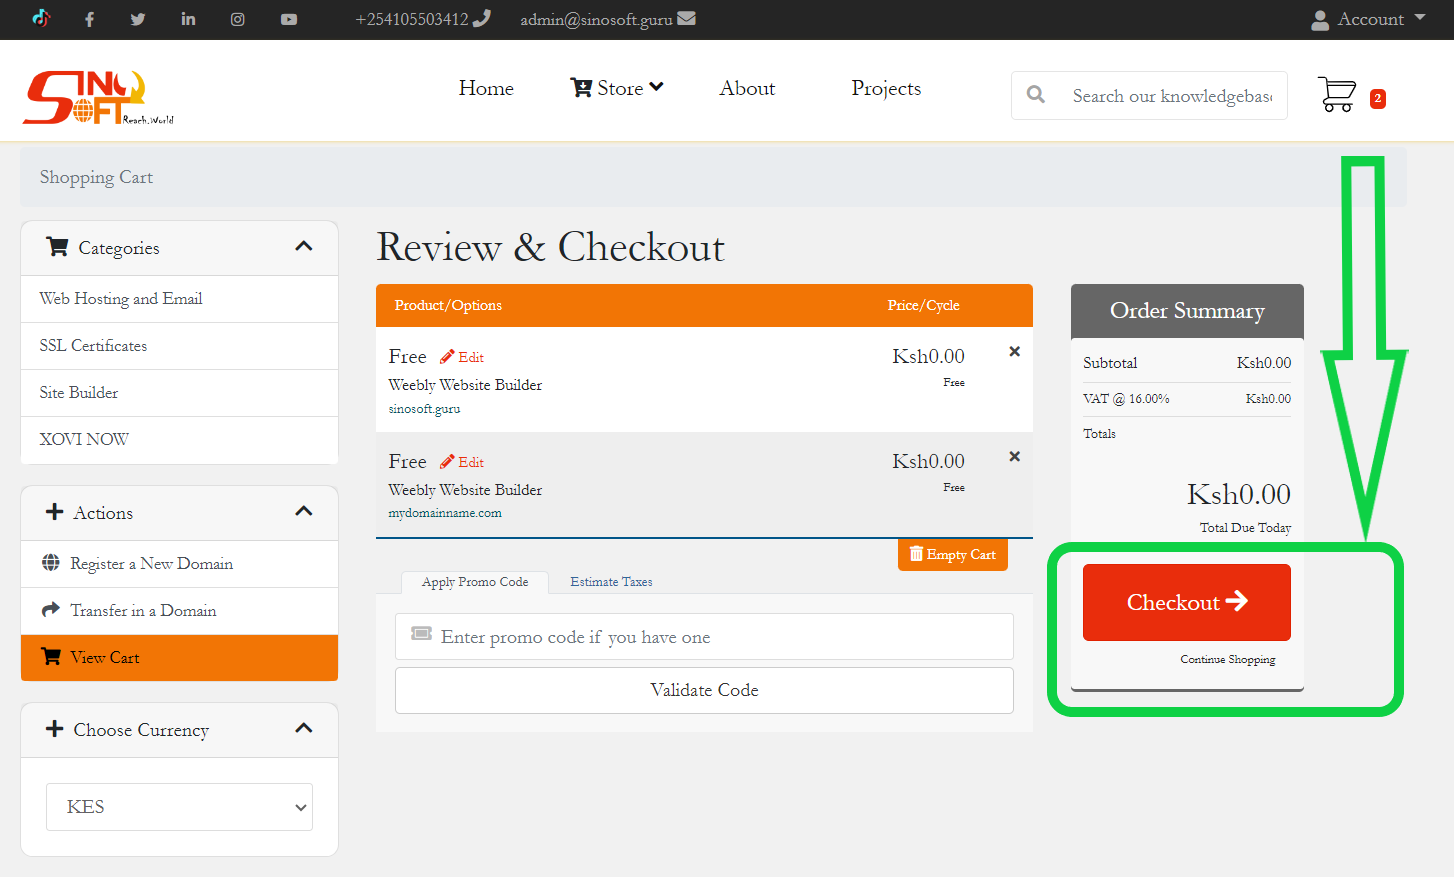
Step 3: Review and Checkout
Review if your order is correct by confirming your domain name on the review and checkout page.
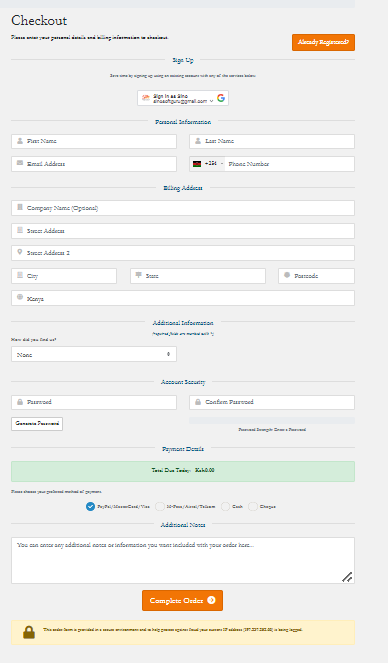
Step 4: Sign Up and Complete Order
Sign up using google or simply input your details then complete your order.
After clicking “Sign Up”, you’re taken to the client area page:-
a. Click on services
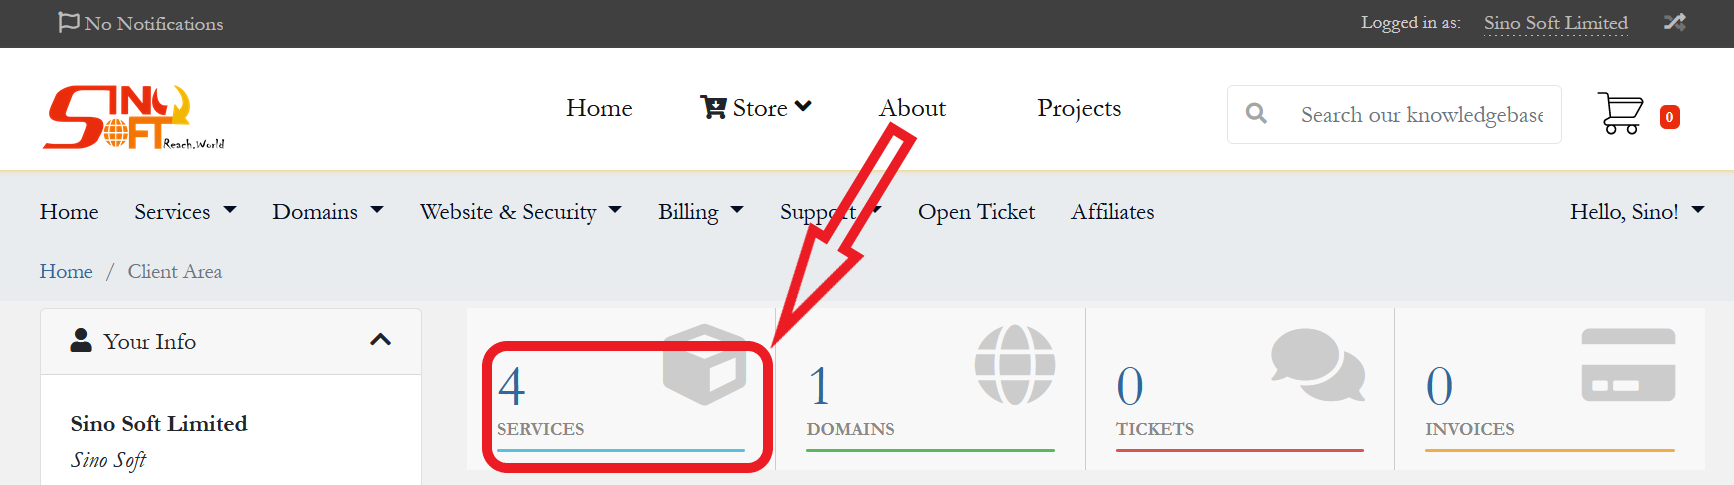
b. Click on Active

c. Click on Login to Weebly

Step 5: Choosing the Type of Website, You Want to Build
After login into Weebly Site Builder you will be prompted to select a theme. Browse through the Weebly’s Themes.
Weebly has more than 40 themes, all of which are totally free! There are plenty categories to choose from: business, portfolio, personal, blog, and more.
Once you’ve filtered the library depending on the type of website you’re planning to build, Weebly will then narrow your choices down to a smaller number of industry-specific templates.
Weebly’s themes aren’t the most attractive on the market. They’re not the worst either, though! They’re not as modern as they could be – which is part of the reason Weebly only scores 2.3 out of 5 for design in our recent research – but they do look reasonably clean and polished and remain free, want better layout?
Try Site Builder where you will build the website you like for free and only be charged when you publish
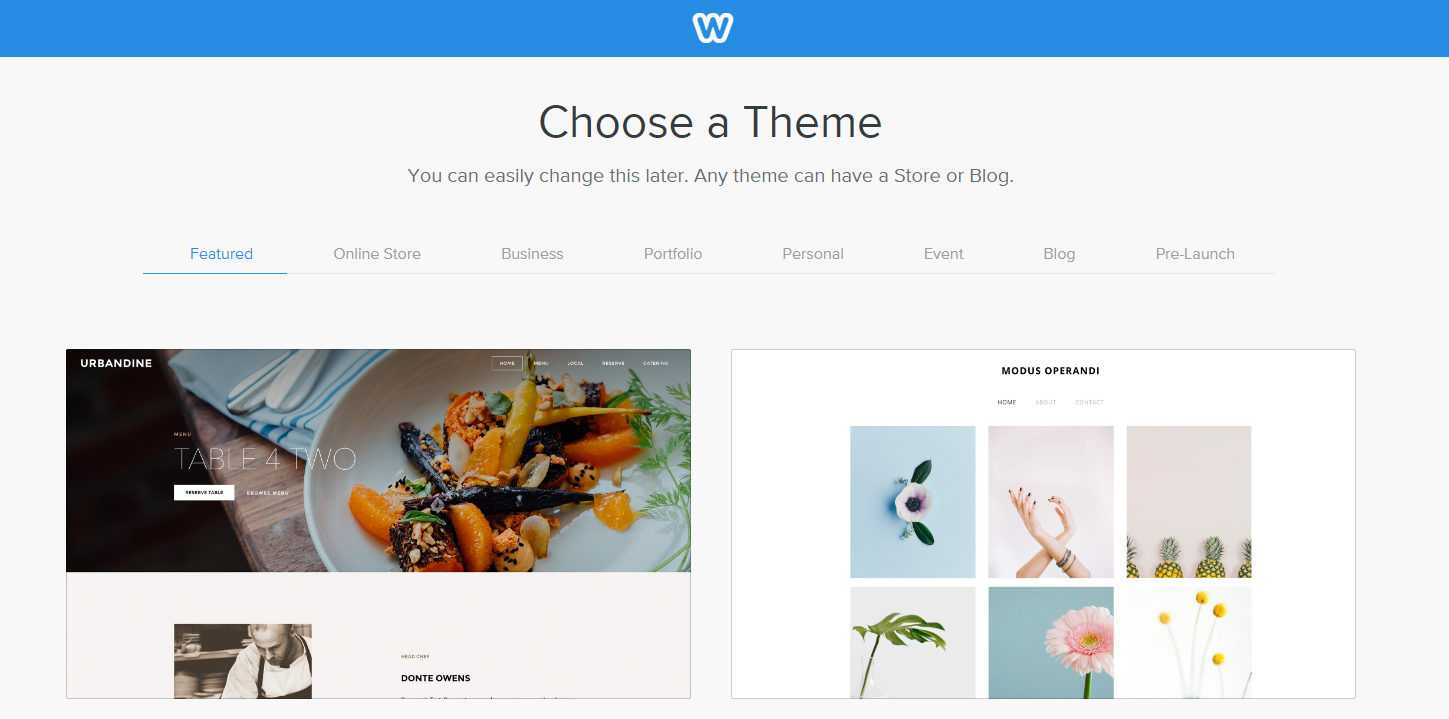
When searching for themes, you can preview each one by clicking the thumbnail to see how it appears on a full screen. We advise doing this for every theme that looks attractive to your eyes. That way, you can navigate around them as if you were a real-life visitor. Then, once you’ve got one you like, hit “Start Editing” in the top right.
If you decide later on that you’d like to try something different, you can change your template by clicking the “Themes” header in the top toolbar. This will redirect you to the template library.
Weebly offers a number of industry-specific options. It has delicious restaurant templates, fresh cleaning service designs, strong-looking personal training themes – you get the idea. These options save you even more design time – you just need to edit the text boxes and images and you’re good to go.

Step 6: Design Your Weebly Website
You’ll automatically be taken to the Weebly website editor once you’ve completed step five. This is where you’ll let your creative juices flow. We’ll go through the menus and features one by one, but here’s what it looks like at first glance:

Editing Text Boxes
Weebly is a “What You See Is What You Get” (WYSIWYG) website builder. This means you can click and edit, as well as drag and drop media, without needing to know any code. So to update the text, simply click the box and type.
Editing the Background
You can customize your theme even more by changing the background. Simply click the background image and select “Edit Background”. From there you can change the image, scrolling effect, and page alignments.
Adding New Elements
This is where you add the fun stuff. Using the “Element Menu”, on the left hand side, simply drag and drop your chosen media icon anywhere on the page. You can pop text, videos, buttons, and more almost anywhere you like. There are some limitations though. Weebly’s templates are organized in rows, so you’ll need to stick to these blocks when moving elements around, which can make full customization tricky.
Take a look at the Element Bar below for just some of the elements you can choose from:

Any element with the lightning bolt symbol next to it can’t be used on the free plan – you’ll need to upgrade to use these features. However, everything else is free for you to play with!
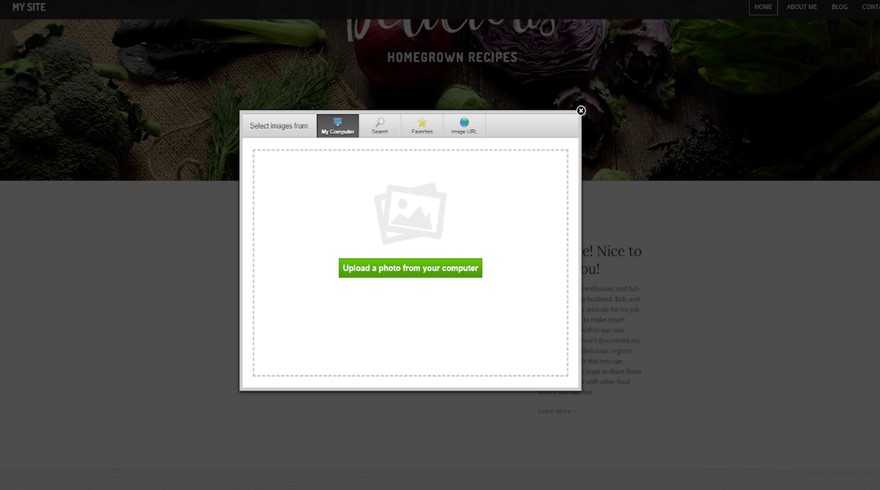
Let’s say you want to add an image. Drag the icon where you want, then click “Upload Image”. A popup will then give you some options: you can upload from your computer, or press “Search” and find a free Weebly image.
To edit other pages on your Weebly website, simply click “Pages” on the top Navigation Menu and choose a different page. Adding elements is the same process for each page – just drag, drop, and click your way to a beautiful website.
From the Navigation Menu, you can make the most of Weebly’s flexibility. Change your theme, edit your site settings, move to a different page – it’s all there.
Adding New Pages
It’s easy to add new pages to your website. Simply go to the Pages tab in your menu and click the plus icon in the left-hand sidebar. A drop-down menu will appear with different types of pages.
Select the type of page you want to create – a blog page, for example – and give it a name. As you do this, Weebly automatically loads the page for you, with pre-filled images and content for you to make your own.
Remember to click “Done” to save your new page’s settings. Once you’ve done this, return to the “Build” menu tab to edit the page just like you would normally!

List of pages to add to your website when editing with Weebly
Weebly provides different types of pages to add to your site.
Changing the Color Scheme
You can change the color theme of your page by heading to the Theme section of your dashboard. For some themes you simply have the options of light or dark, while others give you actual colors to switch between.
This is fairly basic and you won’t see massive changes to your theme, but you can add a custom color to the range of choices if you want to.
Adding New Layouts
To really personalize your website, you’ll want to add new sections to the pages you’re editing. Apart from adding new elements, there’s also the option to add new sections.
This element sits at the top of the left-hand sidebar above all the other elements – simply drag it to where you want it on the page and let go.

Columns of elements to add to your Weebly website with a larger element box above called "Section"
The Sections element sits above all the others in the left-hand sidebar. It’ll give you a list of options: Gallery, Contact, Menu, Featured, and Team. Select the one you want to add.
Editor view of a Weebly website featuring a box to choose the style of section you want to add to the page. You can choose the type of section you want to add to your page.
Weebly then gives you a list of different layouts to choose from, so you can pick the one you like the best. Click on the layout you want, and it’ll appear on your page. Click “Save” in the popup box, and get editing!
Deleting Sections
We all make mistakes, we all change our minds, and we all learn differently – we’re only human after all! That’s why it’s important to know how to delete elements on your site, as well as adding them.
You might want to try out a gallery on your homepage, but then decide it doesn’t work. You’re not stuck with it forever – simply click on the element, and look for the small blue cross that appears in the top right corner of the editing box.
Click on that cross, the box will turn red, and you’ll have the option to delete that element.
Element on a Weebly website selected for deletion with a pop up box asking the user if they're sure they want to delete the element
Deleting elements is easy - simply click the cross!
This is how to delete small elements such as galleries, text boxes, images, buttons, and more.
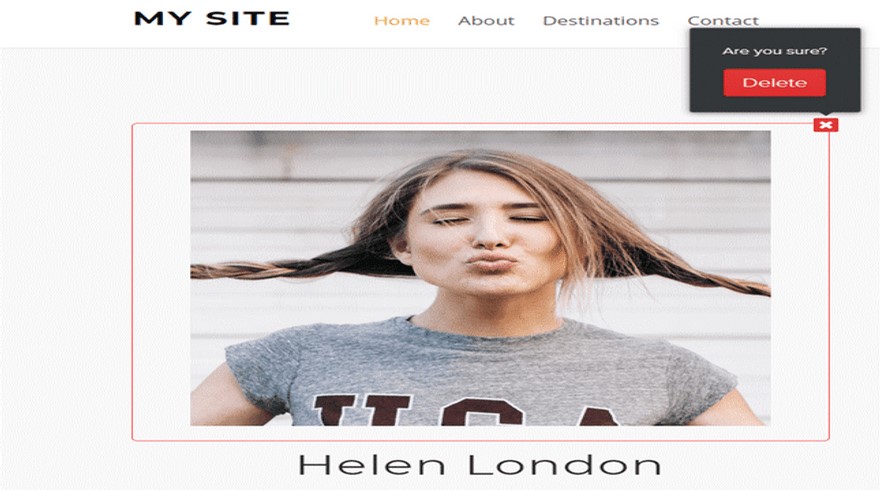
If you want to delete a larger section such as a background, simply click on the area you want to remove. You’ll see a few options appear: Edit, Move, and Delete. Click the Delete button and you’ll see a popup asking you if you’re sure you want to delete. At this point, you can either cancel or confirm – if you click “Delete” then that section and everything inside it will be deleted.
This “are you sure?” method means you won’t scrap any bits of your website by accident, which is a relief!
A section on a Weebly website with action buttons above, including "Delete"
You can delete whole sections of your page if you want to - just click "Delete" and then confirm your decision!
Step 7: Publish Your Weebly Website
If you’re happy with what you’ve created, you can now publish. Great! If you’re not completely happy, don’t worry – you can revisit the Weebly website editor to make some changes after you publish.
To publish your site, hit the blue “Publish” button in the top right corner. You will then receive a popup telling you it’s published, and how to integrate a “Pro Tip”. Weebly really wants your site to succeed.
You’ve now published your Weebly website. Like we said, it’s easy to update and edit at any time. You can also upgrade your plan if you want to. Just head back to Weebly Free Site Builder

Pop up when publishing your Weebly site, with buttons to share across social media or upgrade to a higher plan, along with a top tip from Weebly.
After publishing, Weebly provides a helpful Pro Tip!
You may also be interested in creating a website with more advanced templates using our drag and drop Do It Yourself (DIY) Site Builder.
Unpublishing Your Site
If you publish your site, but then change your mind, you can head to your Settings and scroll down to the very bottom. There, you’ll find an option to unpublish your site with a single click. Easy!
How to Use Weebly: Summary
So, from Sign Up to Publish, these are the eight steps for creating a Weebly website. It really is that simple!
If you’re looking for a basic, no-frills-attached website, then Weebly could be a good fit for you. It has a free plan that you can stay on for as long as you’d like, and it’s pretty straightforward to use.
Ultimately, Weebly is a fairly average builder, and it doesn’t really excel in any area, from value to money to website features. Where Weebly is really let down is its design options. Yes, its templates are clean and professional, but they’re not as contemporary as we’d like and they’re overshadowed by more sophisticated templates from the likes of Sino Soft Site Builder.
If you do want to try out Weebly, we’d recommend choosing a premium plan for a more advanced, personalized Weebly website that truly works for you. You can as well Contact Us for professional Website Design.


